
ShipTime's Batch Shipments feature helps you create multiple shipments at once, saving time when processing larger shipping volumes.
There are two ways to create batch shipments:
- Manual Entry: Select multiple recipients from your saved Address Book and create shipments using the same package dimensions, weight, and applicable shipping options.
- CSV Upload: Upload a formatted CSV containing the details for multiple shipments. Individual shipments can have different package details and options.
This guide covers the CSV Upload method.
How to Access Batch ShipmentsImportant: Batch Shipments are currently available for domestic shipments within Canada only. Your ShipTime account must also be activated to use CSV Upload. Contact Heroic Support or your ShipTime Account Manager if you need access.
From your ShipTime dashboard, select Batch Shipment.
You will be given the option to use Manual Entry or CSV Upload.
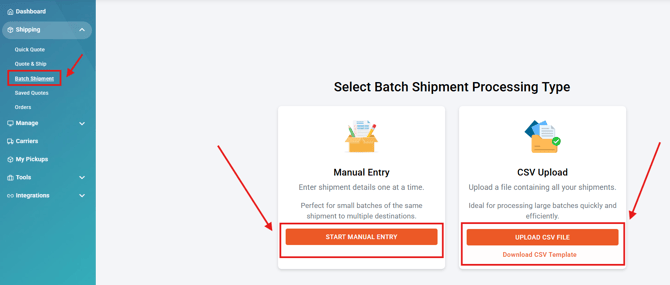
If you want to create multiple shipments using recipients already saved in your Address Book, see our Batch Shipments – Manual Entry Guide.
Step 1: Download the CSV TemplateDownload the Batch Shipment Customer Instructions Template provided on the Batch Shipment page.
Use the template to prepare the shipment information for your upload. Make sure:
- All required fields are completed
- The header row is included
- The required formatting is followed
- Your upload file is saved in CSV format

Following the template closely will help prevent validation errors when the file is uploaded.
Step 2: Upload Your CSVSelect Upload CSV file, choose your completed CSV from your computer, and click Open.
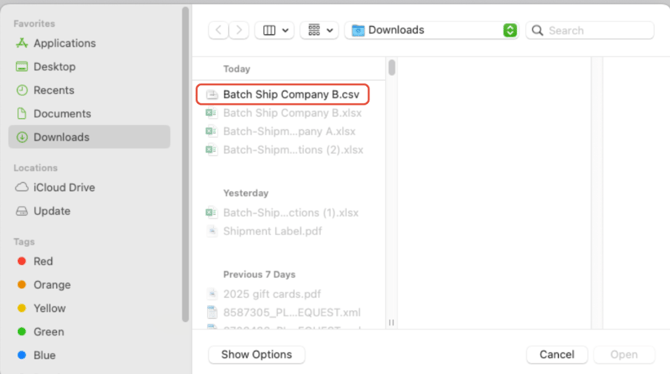
ShipTime will review the file before allowing you to continue.
Step 3: Review and Resolve ErrorsIf ShipTime detects an issue in the file, a warning will identify the affected line numbers.
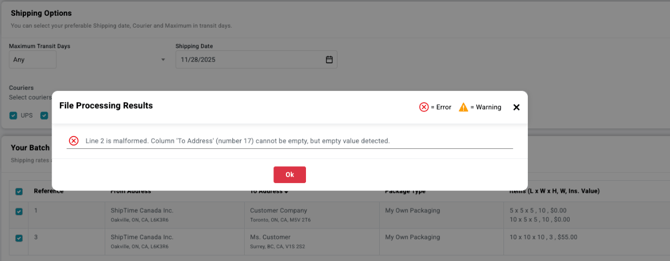
You can either:
- Correct the issues in your CSV, save the file, and upload it again, or
- Continue with the valid rows and exclude the rows containing errors
Review any errors carefully before proceeding to make sure all intended shipments are included.
Step 4: Select Your Shipping OptionsOnce the CSV has been successfully uploaded, you will be taken to the Shipping Options page.
Review and select the applicable preferences, such as the shipping date and available shipment options, then click Get Quote.
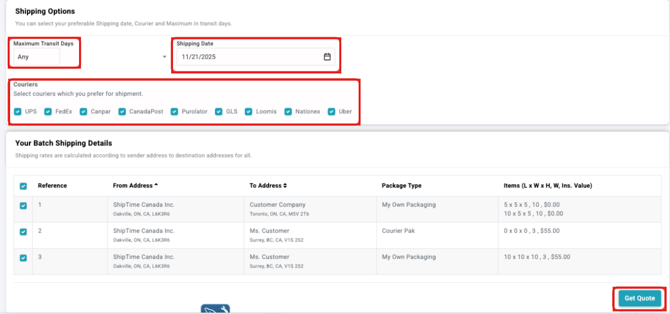
ShipTime will display available quotes for the shipments in your batch.
Review the available services and select Pick-up or Drop-off where applicable.
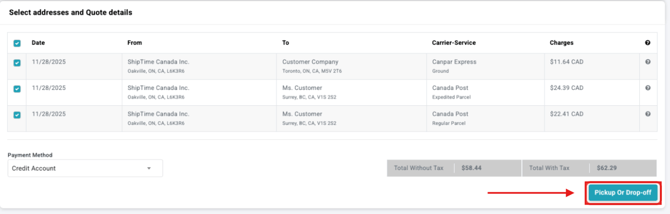
The selected Pick-up or Drop-off option applies to all shipments assigned to that courier within the batch.
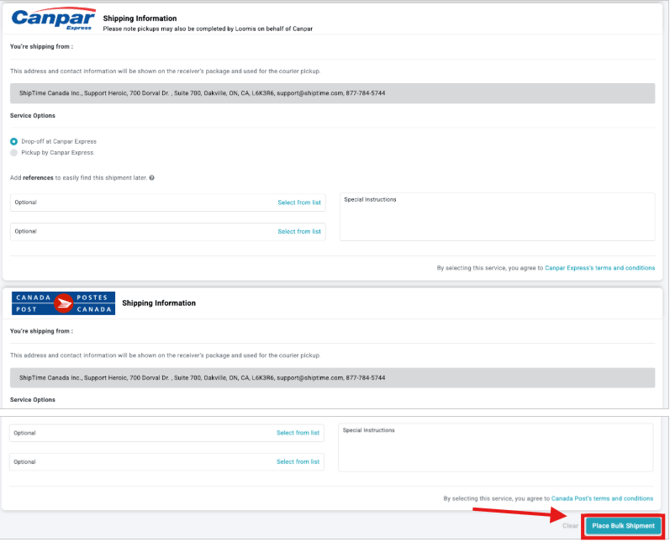
Step 6: Complete Your BatchOnce you have reviewed the shipments and selected your options, click Place Bulk Shipment.
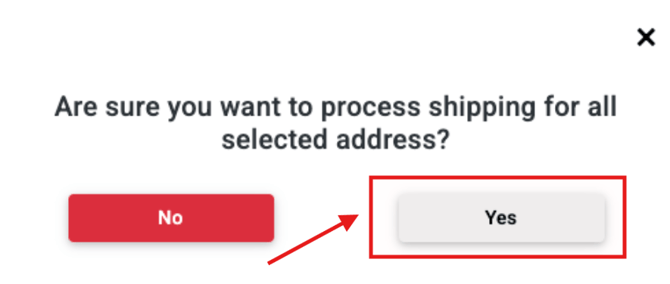
A confirmation window will appear. Select Yes to proceed.
ShipTime will then create the shipments and generate the applicable shipping labels.
Step 7: Download Your LabelsOnce processing is complete, select Download Labels to download the labels for your batch in a single file for easier printing.
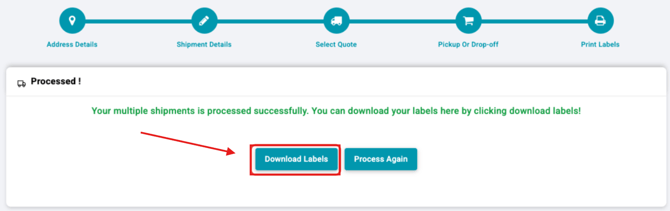
The combined label file is available from the Download Labels page. If you leave this page without downloading it, individual shipment labels can still be accessed later through Manage > History & Tracking.
CSV Formatting TipsTo help prevent upload errors:
- Keep fields within the 40-character limit
- Avoid using commas within fields
- Follow the formatting provided in the Batch Shipment template
- Make sure all required fields are completed
- Use the correct package type codes
Package Type Codes
| Code | Package Type |
|---|---|
| PACKAGE | My Own Packaging |
| LETTER | Courier Envelope |
| ENV | My Own Envelope |
| PAK | Courier Pak |
These codes should be entered exactly as shown in the CSV where applicable.
Before Creating a Large BatchCheck your email preferences under Settings > Preferences before submitting your batch.
If Shipment Creation Emails are enabled, ShipTime will send a separate shipment creation email for each shipment in the batch. For larger batches, this may result in a high number of emails.
Need Help With a Batch Shipment?If you're having trouble formatting your CSV, receiving upload errors, or need CSV Upload activated on your account, contact our Heroic Support™ team. We can help you review the requirements and get your batch ready to process.
Not using ShipTime yet? Create a free ShipTime account to compare discounted shipping rates from multiple leading couriers in one place.