
ShipTime offers two batch shipping options to help businesses process high-volume shipments more efficiently: Manual Entry and CSV Upload.
The Manual Entry option is ideal when you want to create multiple shipments using the same package dimensions and shipping options for several recipients. It works directly with your existing ShipTime address book, making it a great option for repeat shipments such as subscription boxes, promotional mailouts, and customer campaigns.
If you need to process multiple shipments with different dimensions or shipment details, you can use the CSV Upload option instead.
Important: Batch shipment tools are available for domestic shipments only, and your account must be activated to use them. If batch shipping is not yet enabled on your account, please contact Heroic Support™ or your ShipTime Account Manager.
What Is the Difference Between Manual Entry and CSV Upload?Manual Entry
Use Manual Entry when:
- You are shipping to multiple recipients from your existing address book
- All shipments use the same dimensions and shipment options
- You want a fast and simple way to create multiple labels at once
CSV Upload
Use CSV Upload when:
- Each shipment may have different dimensions, weights, or options
- You want to upload shipment details in bulk using a formatted spreadsheet
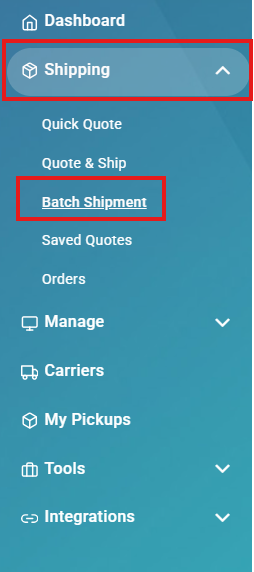
1. Open Batch Shipment
From your ShipTime dashboard, click Batch Shipment.
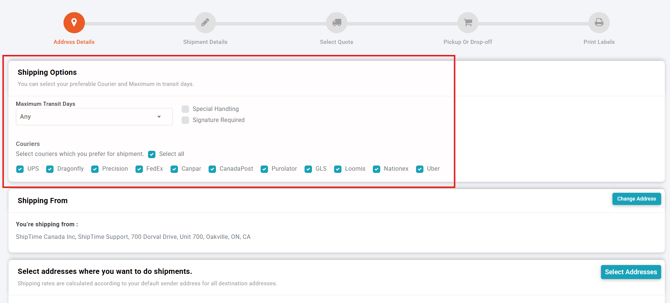
2. Choose Your Shipping Options
The Shipping Options window will appear. Select the shipment preferences you want to apply to the batch.
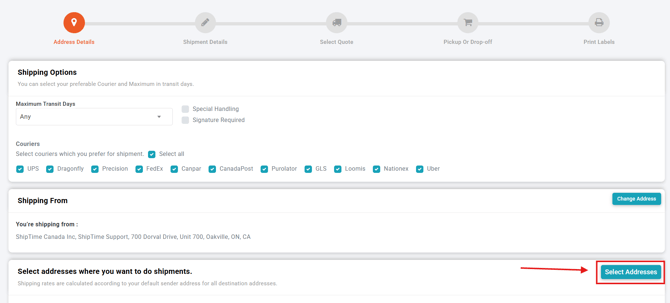
3. Select Recipient Addresses
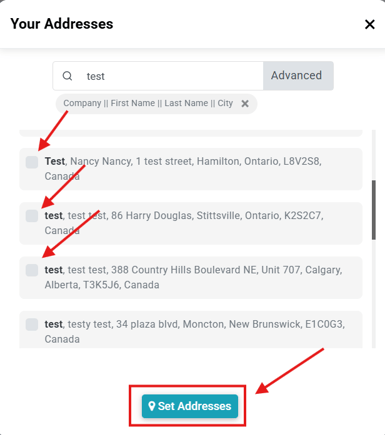
Click Select Addresses to open your ShipTime address book.
Choose the recipients you want to include, then click Set Addresses.
4. Confirm Shipment Quantities
Review the list of selected recipients and confirm the number of shipments required for each address.
Once confirmed, click Shipment Details.
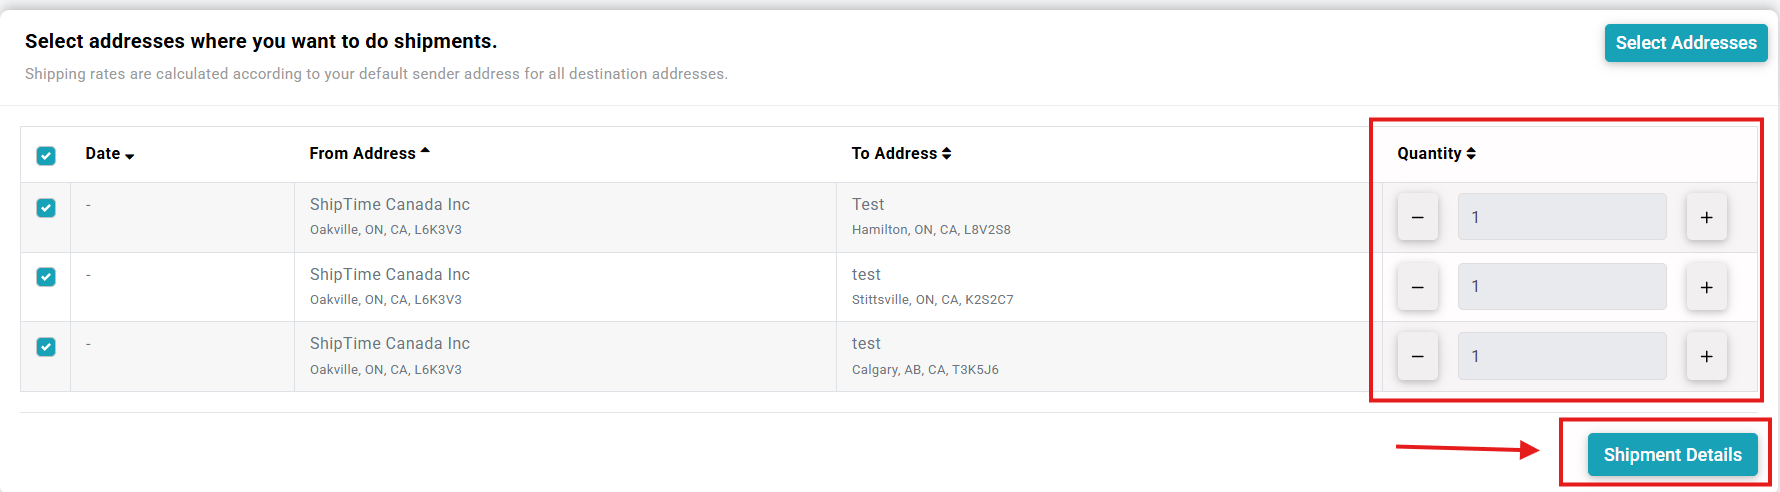
5. Enter Package Details
Enter the package dimensions and any required shipment details, then click Get Quote.
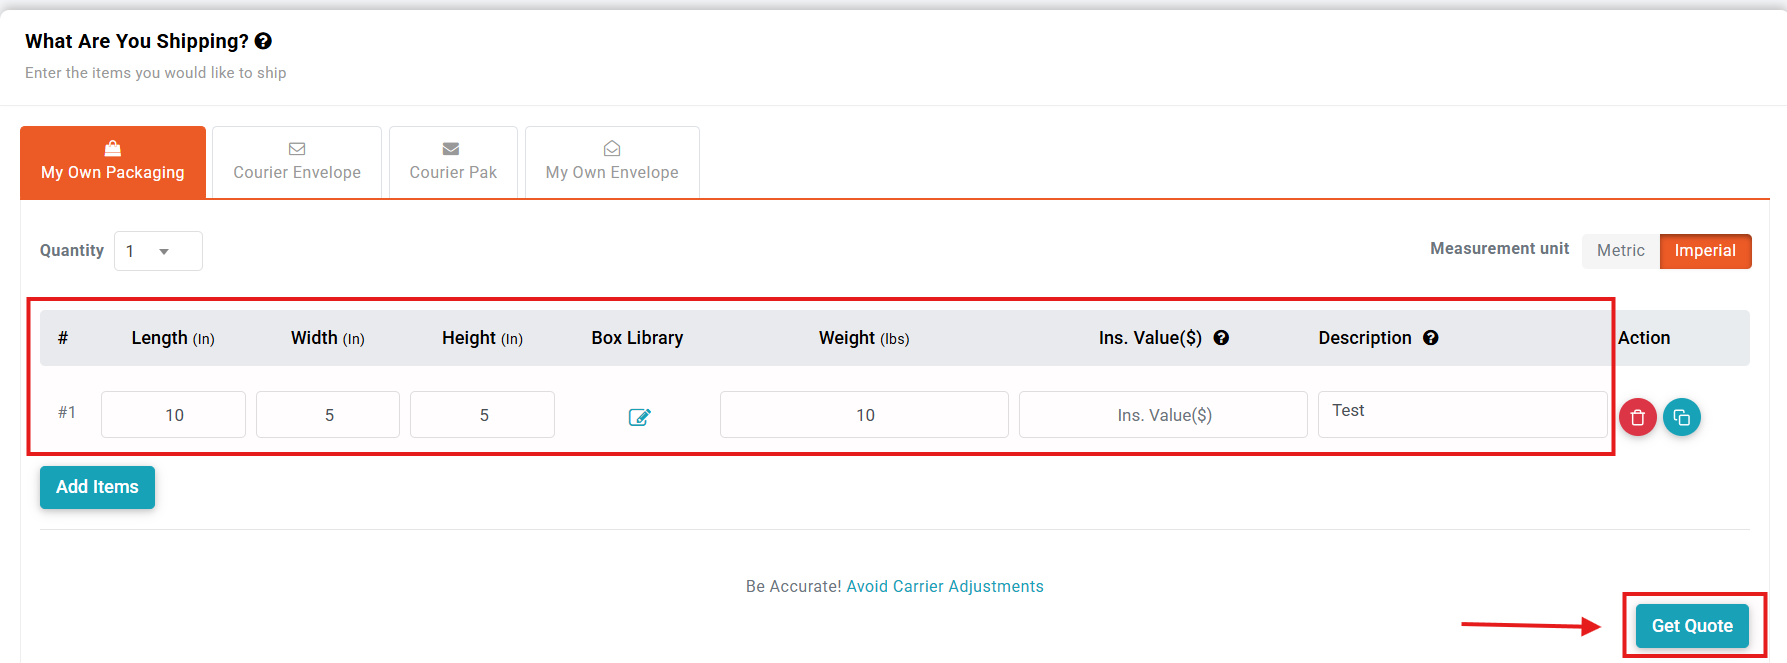
6. Review Quotes
ShipTime will display the available quotes for each selected address.
Review the shipping options, then click Pick-up or Drop-off.
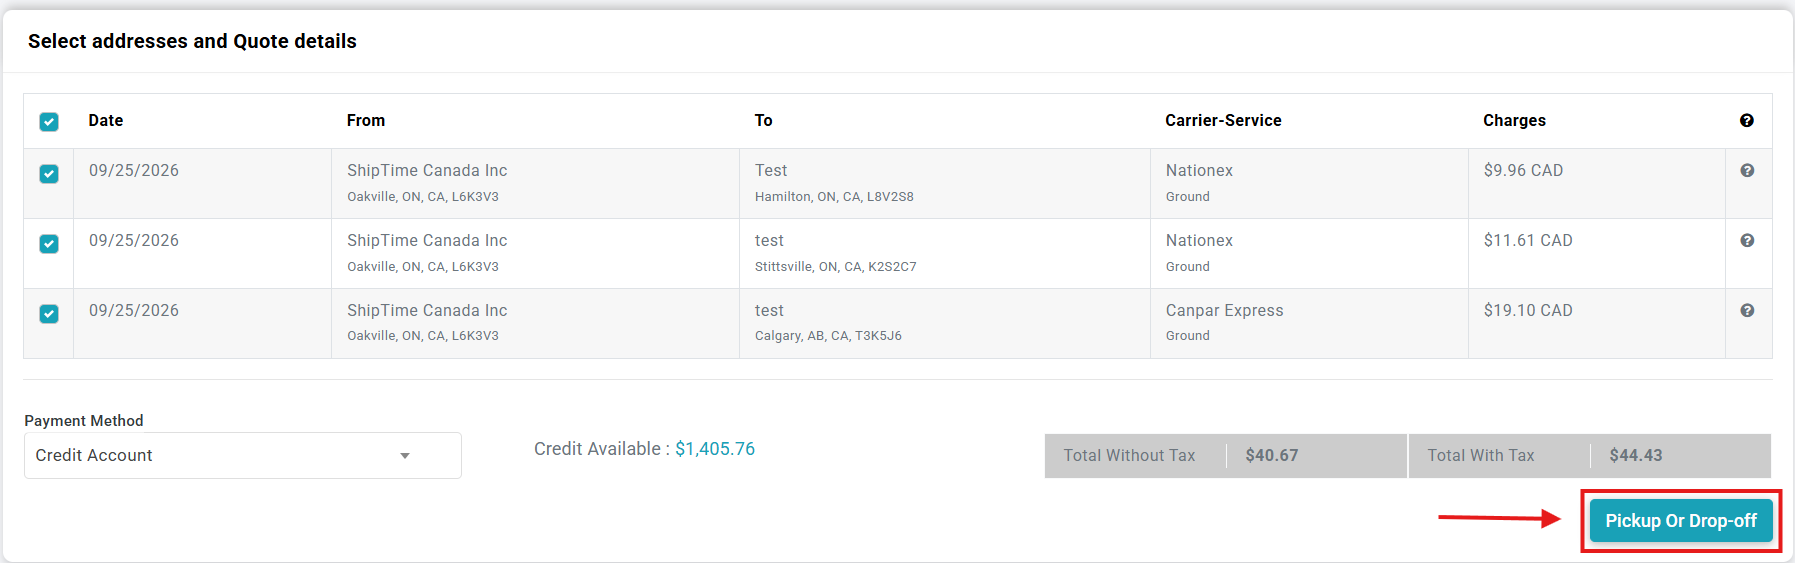
7. Select Pick-up or Drop-off Preferences
Choose your preferred pick-up or drop-off option for each carrier being used in the batch.
Once your selections are complete, click Place Bulk Shipment.
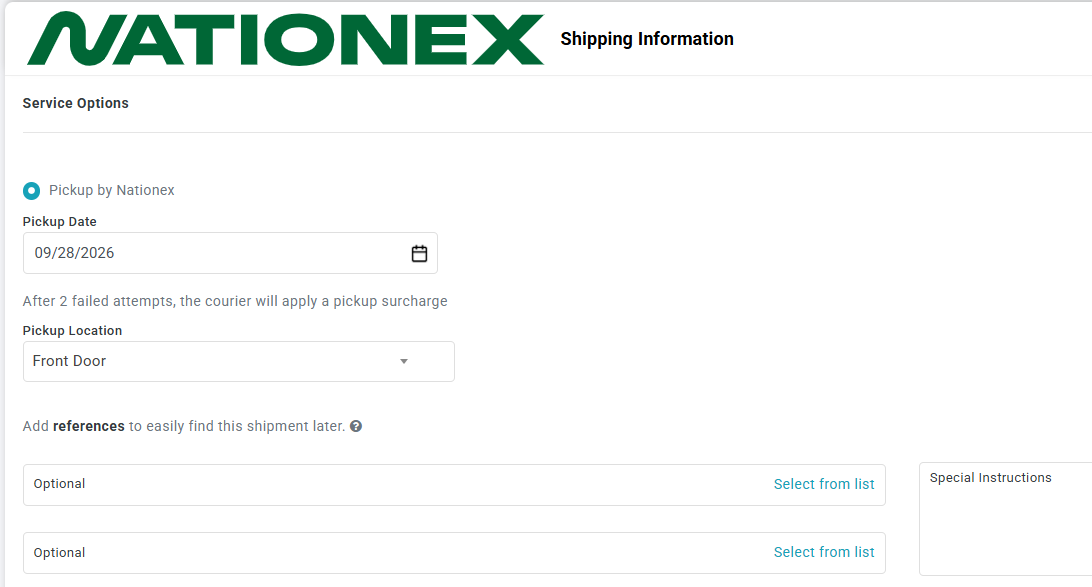
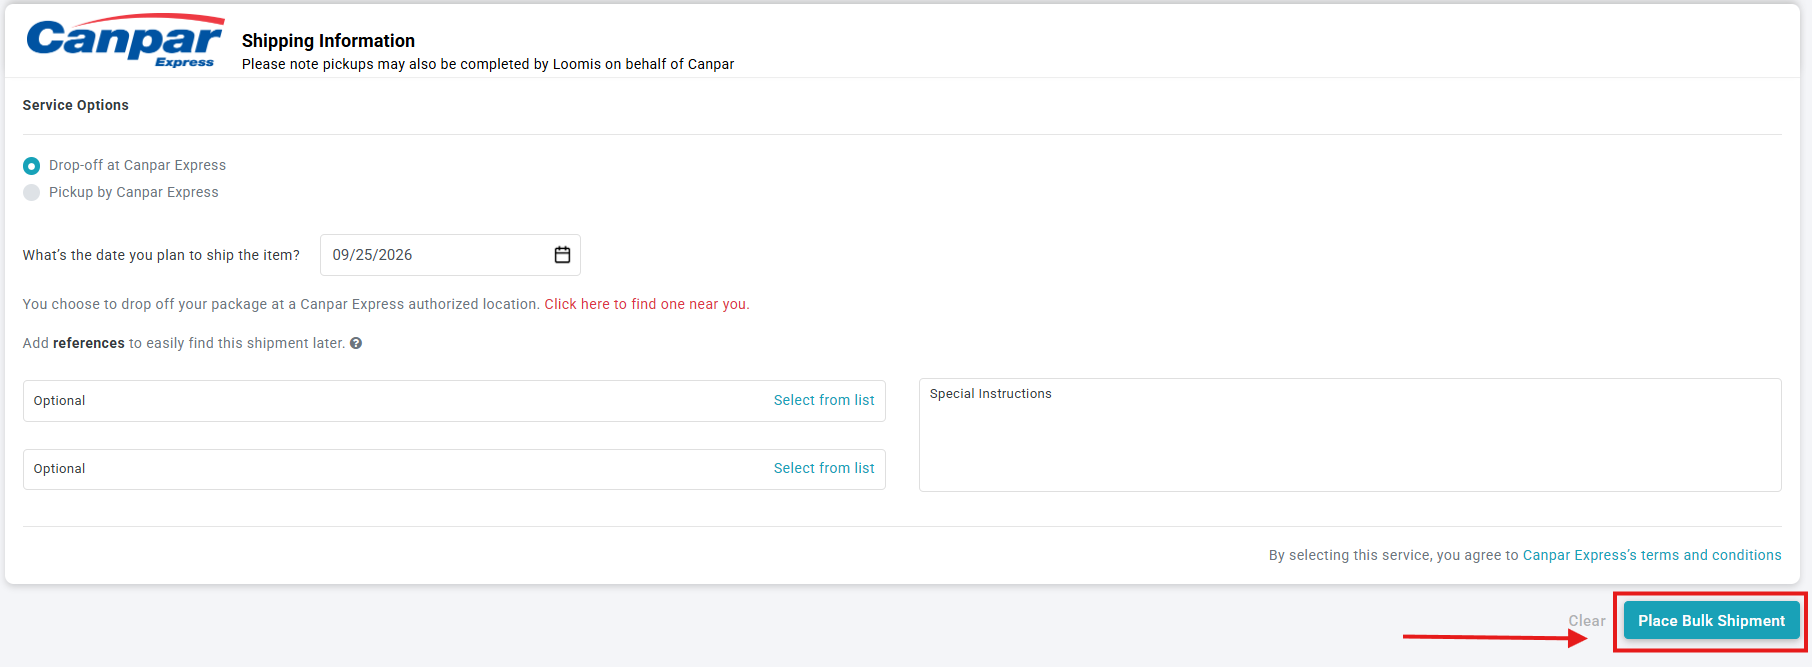
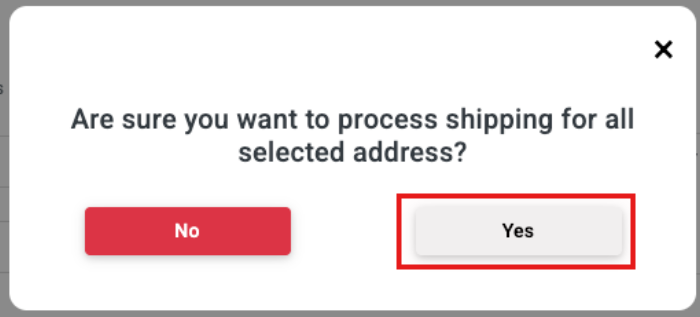
8. Confirm the Batch Shipment
A confirmation prompt will appear. Review your batch shipment details and confirm to proceed.
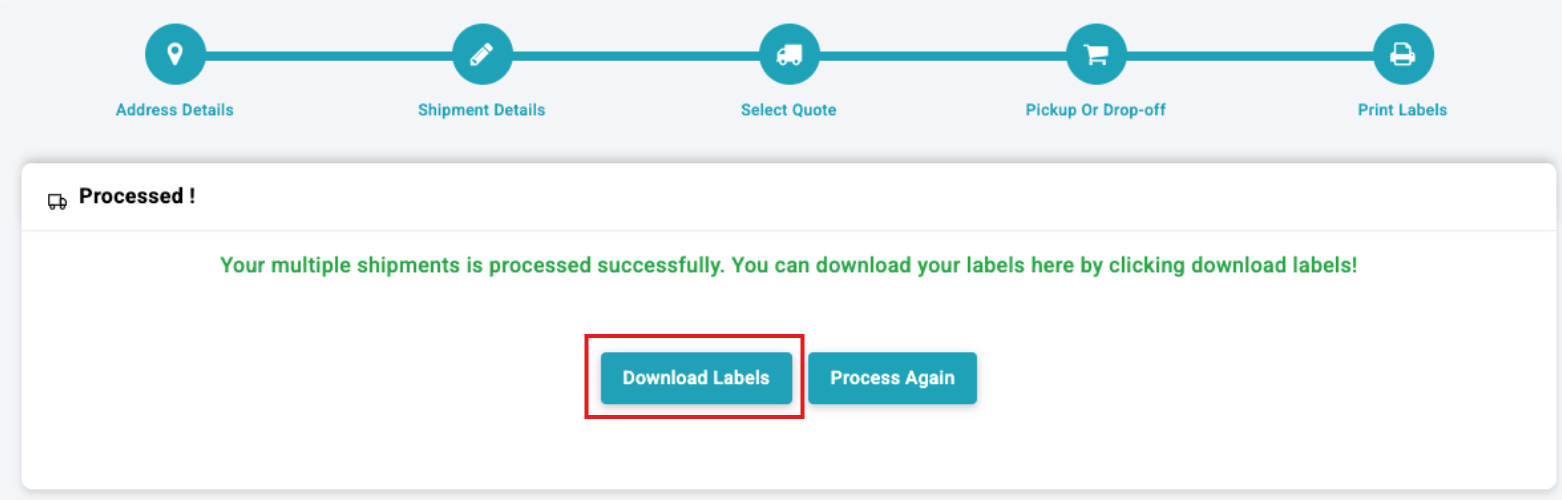
9. Download Your Labels
Once the batch shipment is processed, your labels will be generated in a single downloadable file.
Both Manual Entry and CSV Upload are available for domestic shipments within Canada only. These tools are designed to help businesses save time, reduce manual work, and process multiple shipments more efficiently.
When to Use Manual EntryManual Entry is a strong option when:
- You already have recipient addresses saved in your address book
- All shipments are going out with the same package size and service preferences
- You want to create multiple shipments quickly without building a CSV file
If your shipments vary by size, weight, or service requirements, the CSV Upload option may be a better fit.
Need Help with Batch Shipping?If you need help setting up batch shipments, activating the feature on your account, or deciding whether to use Manual Entry or CSV Upload, our Heroic Support™ team is here to help. Contact us by phone, live chat, or email Monday to Friday from 8:30 AM to 8 PM EST.
Ready to ship smarter? Create your free ShipTime account and access discounted rates from leading couriers, all in one platform.